How to Set Up Drip Irrigation on a Small Farm (Under ₹1 Lakh)
A practical guide to planning and installing drip irrigation for 1–5 acre farms without breaking the budget.
How to Set Up Drip Irrigation on a Small Farm (Under ₹1 Lakh)
Drip irrigation is the single best investment a small farmer can make. It saves water, reduces disease, improves yields, and pays for itself within one crop cycle. And despite what many assume, you don't need a large budget to get started.
At Aasaankrishi, we installed drip irrigation across 2 acres for under ₹45,000 — and with government subsidies, the effective cost came down to under ₹15,000.
This guide walks you through everything: planning, components, installation, costs, and subsidies available in India.
Why Drip Over Flood Irrigation?
Most small farmers in Jharkhand still use flood or furrow irrigation. It's familiar, requires no upfront investment, and feels simple. But the numbers tell a different story.
| Factor | Flood Irrigation | Drip Irrigation |
|---|---|---|
| Water usage | 100% | 40–50% |
| Fertilizer efficiency | 30–40% | 80–90% |
| Labour (per season) | High | Low after setup |
| Disease risk | High (wet foliage) | Low (dry foliage) |
| Yield improvement | Baseline | 20–40% higher |
| Setup cost | ₹0 | ₹15,000–₹80,000/acre |
The water saving alone justifies drip in areas where borewell water is limited. For turmeric specifically — a crop that needs consistent moisture but cannot tolerate waterlogging — drip is almost mandatory.
Understanding a Drip System
A drip system has five main components:
- Water source — borewell, open well, or tank
- Pump and motor — to pressurize water
- Filter unit — to prevent emitter clogging
- Mainline and sub-mains — HDPE pipes that carry water through the field
- Lateral drip lines — thin pipes with emitters that drip water at plant roots
Water flows: Source → Pump → Filter → Mainline → Sub-mains → Laterals → Plant roots.
Optionally, a fertigation unit (venturi injector or fertilizer tank) can be added to deliver liquid fertilizers through the drip system — one of the biggest advantages of drip over flood.
Step 1: Plan Your Layout
Before buying anything, sketch your field on paper.
Mark:
- Water source location
- Field shape and dimensions
- Crop rows and bed positions
- Where the mainline will run (usually through the center)
- Where sub-mains will branch off
Key planning rules:
- Mainline runs the length of the field, sub-mains run perpendicular
- Each lateral line runs along one crop row
- Keep lateral length under 60 metres for uniform pressure
- Place the filter unit as close to the water source as possible
A 1-acre rectangular field typically needs:
- 80–100 metres of mainline
- 150–200 metres of sub-main
- 1,200–1,500 metres of drip lateral (depending on row spacing)
Step 2: Choose the Right Components
Drip Lateral Type
For most vegetable and spice crops, use inline drip laterals — these have emitters built into the pipe at fixed spacing (20cm, 30cm, or 40cm).
- 20cm spacing: dense crops like onion, garlic, vegetables
- 30cm spacing: turmeric, ginger, chilli
- 40cm spacing: wider-spaced crops like papaya, moringa
Emitter Flow Rate
- 1 litre/hour: low-water crops, sandy soil
- 2 litres/hour: standard for most crops
- 4 litres/hour: high-water crops, clay soil
We use 2 L/hour emitters at 30cm spacing for our turmeric.
Filter Unit
This is the most critical component. A clogged filter ruins the entire system. Use a 120-mesh screen filter as minimum. If your water source has sand or silt, add a sand media filter before the screen filter.
Never skip the filter to save money. We learned this the hard way — 15% of our emitters clogged within a week of using an undersized filter.
Step 3: Calculate Materials Needed
For a 1-acre field with turmeric at 30cm × 30cm spacing:
- Rows: approximately 30 rows of 30 metres each
- Lateral length needed: 30 × 30m = 900 metres
- Sub-main: 2 × 30m = 60 metres
- Mainline: 80 metres
Use this formula for any field:
Lateral length = (Field width ÷ Row spacing) × Field length
Sub-main = Field width × 2
Mainline = Field length + 20m extra
Complete Cost Breakdown
1 Acre Setup (Turmeric, 30cm spacing)
| Component | Quantity | Rate | Cost |
|---|---|---|---|
| 63mm HDPE mainline | 80m | ₹45/m | ₹3,600 |
| 40mm HDPE sub-main | 60m | ₹28/m | ₹1,680 |
| 16mm drip lateral (2L/hr, 30cm) | 900m | ₹8/m | ₹7,200 |
| 120-mesh screen filter | 1 | ₹3,500 | ₹3,500 |
| Venturi fertigation unit | 1 | ₹1,800 | ₹1,800 |
| Connectors, end caps, fittings | Lot | — | ₹3,200 |
| Labour (3 days, 2 workers) | — | ₹500/day | ₹3,000 |
| Miscellaneous | — | — | ₹1,000 |
| Total | ₹25,000 |
2 Acre Setup (Our actual installation)
| Component | Cost |
|---|---|
| All pipes and drip laterals | ₹28,000 |
| Filter + fertigation unit | ₹5,300 |
| Fittings and connectors | ₹2,860 |
| Labour (5 days) | ₹8,000 |
| Miscellaneous | ₹1,500 |
| Total | ₹45,660 |
| Less: returned unused material | -₹6,000 |
| Net cost | ₹39,660 |
Government Subsidies: Up to 80% Off
The Pradhan Mantri Krishi Sinchayee Yojana (PMKSY) offers significant subsidies on drip irrigation:
| Farmer Category | Subsidy |
|---|---|
| Small and marginal (under 2 acres) | 80% |
| SC/ST farmers | 80% |
| Other farmers | 55% |
For a ₹25,000 installation on 1 acre:
- Small farmer effective cost: ₹5,000
- Other farmers: ₹11,250
How to Apply
- Visit your Block Agriculture Office with land documents
- Apply under PMKSY — Har Khet Ko Pani scheme
- Get approval before purchasing (subsidy is reimbursed post-installation)
- Buy from an approved vendor (list available at agriculture office)
- Submit installation photos and bills for reimbursement
Processing time: 4–8 weeks typically. Some states have online portals.
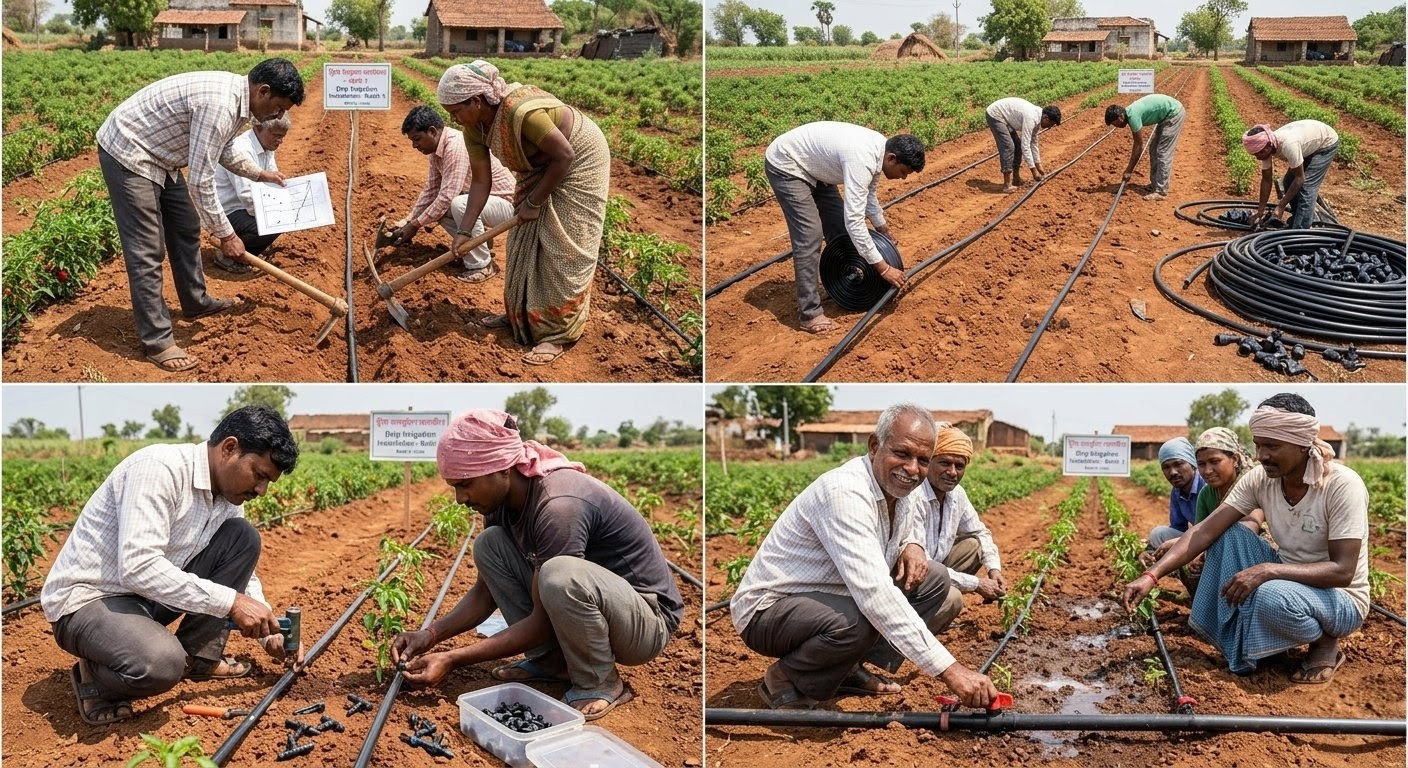
Step 4: Installation
Day 1 — Mainline
- Lay the mainline from pump/filter location through the centre of the field
- Connect to filter outlet using appropriate fittings
- Do not bury yet — test first
Day 2 — Sub-mains
- Branch sub-mains off the mainline using T-connectors
- Run sub-mains perpendicular to mainline, one per section
- Flush sub-mains before connecting laterals
Day 3-4 — Lateral Lines
- Roll out drip laterals along each crop row
- Punch holes in sub-main using a punching tool and insert lateral connectors
- Cap the end of each lateral with an end cap
- Pin laterals to the ground every 3–4 metres to prevent wind movement
Day 5 — Testing
- Run the pump at full pressure
- Walk every lateral line checking for leaks and clogged emitters
- Adjust timer to achieve target water volume per plant
- Check pressure at far end of the field — should be within 10% of inlet pressure
Setting Up the Timer
Drip systems work best with automated timers. A basic ball valve timer costs ₹800–₹1,500 and runs for 1–24 hours.
How to calculate run time:
Enjoyed this article?
Subscribe for weekly farm updates and new agricultural guides.
Subscribe for Free